I made a WireGuard package for pfSense
-
@Ascrod said in I made a WireGuard package for pfSense:
If you're using pfSense 2.4.5 like I am, you can use these commands on the command line interface, or the Command Prompt page on the web interface:
pkg add http://pkg.freebsd.org/FreeBSD:11:amd64/latest/All/wireguard-1.0.20200319_2.txz
pkg add http://pkg.freebsd.org/FreeBSD:11:amd64/latest/All/wireguard-go-0.0.20200320.txz
pkg add https://github.com/Ascrod/pfSense-pkg-wireguard/releases/download/v1.0.0/pfSense-pkg-wireguard-1.0.0.txz
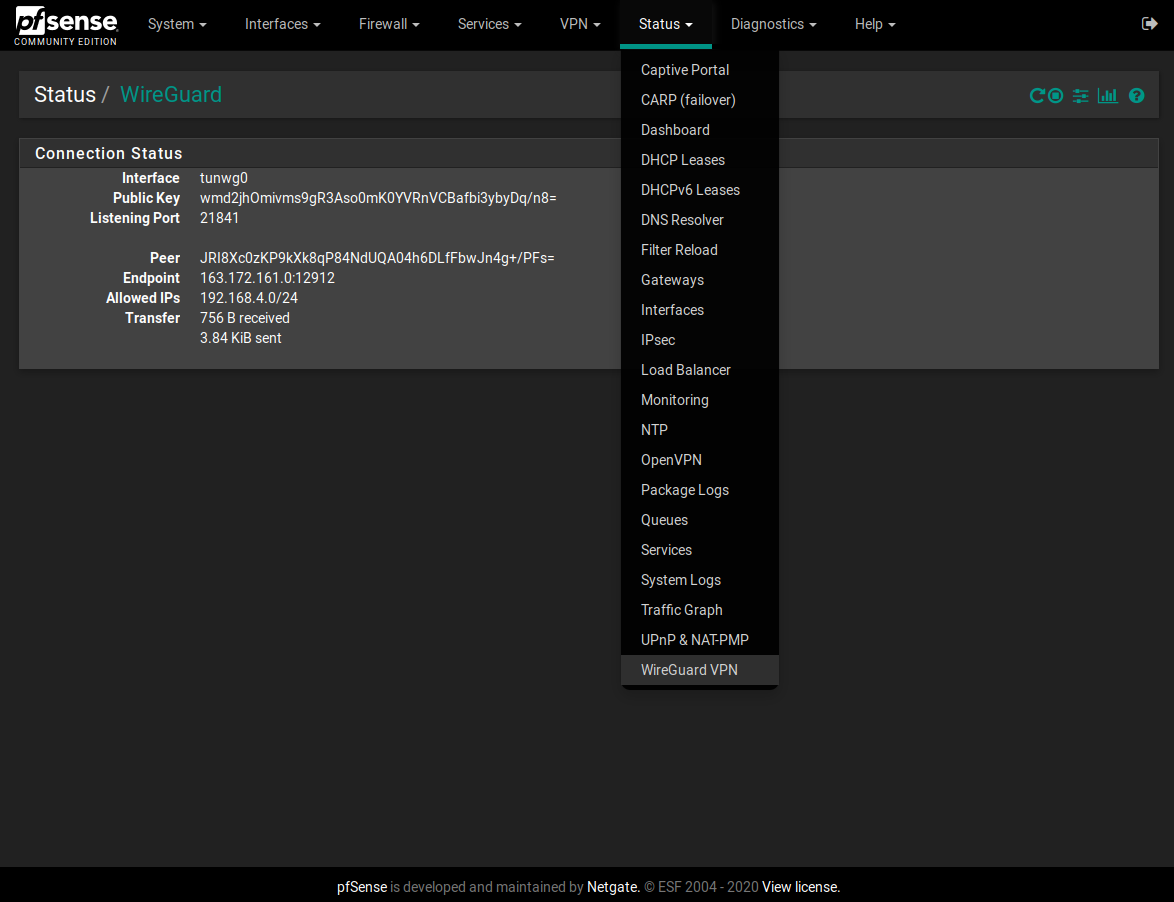
I'm on pfSense 2.4.5, and on the status page I can see only the interface and not the peer that I've correctly configured.

I've OpenVPN clients running but I've tried to disable every clients, disabled OpenVPN clients interfaces, rebooted but nothing. Only Interface tunwg0 is up and not the peer (WireGuard Mullvad Server).
Thank you so much,
-
Dear Ascrod,
Hello and I hope that you are safe and well during these trying days and times. I set this up on a VM and have it working well using TORGUARD WIREGUARD service. I tried my hand at this earlier on see here : https://forum.netgate.com/topic/145099/pfsense-wireguard-client-working-with-catch-22 - with albeit limited success. My question is - can you make an Ascrod pfSense-pkg-wireguard-1.0.0.txz package for pfSense 2.5.0 . You answered another on here who inquired about pfSense 2.5.0 that " Unfortunately I don't have a spare physical machine to use for testing 2.5, but I did install all three packages on a VM and did some preliminary testing." Well, I tried this on pfSense 2.5.0 and your current pfSense-pkg-wireguard-1.0.0.txz package - and I could not install it because it said that I had the wrong architecture. Overall, I wish to thank you for your outstanding work on building this package and advancing the development of WireGuard on pfsense. Peace - God Bless You and Yours - and stay Safe -
@dubatech I followed the guide and I think the tunnel towards Mullvad is up.
Interface tunwg0
Public Key --------------------------------------------------
Listening Port 51820Peer ---------------------------------------
Endpoint 185.65.135.222:51820
Allowed IPs 0.0.0.0/0
Latest handshake 12 seconds ago
Transfer 1.93 KiB received
9.66 KiB sentHowever. I the gateway is considered down, which means I cannot route any traffic through the tunnel. I have two redundant OpenVPN to Mullvad, and want to be able to select which traffic should be sent by wireguard. But since the gateway is considered down, I cannot get it to work.
And by the way. You Mullvad said you could upload your public key by:
curl https://api.mullvad.net/wg/ -d account=YOURMULLVADACCOUNTNUMBER --data-urlencode pubkey=YOURPUBLICKEY
I got it to work by:
curl https://api.mullvad.net/wg/ -d account=YOURMULLVADACCOUNTNUMBER -pubkey=YOURPUBLICKEY
I assume that the key alreay are URL-encoded. -
Interesting development, looks promising.
Just a small addition from me: I wasn't able to pull the mentioned packages on my Netgate SG-1100, as it isn't
amd64. As far as I see the wireguard-packages you depend on aren't yet available foraarch64Your command gives me:
pkg: wrong architecture: FreeBSD:11:amd64 instead of FreeBSD:11:aarch64then I browsed the repo at
http://pkg.freebsd.org/FreeBSD%3A11%3Aaarch64and could not find the mentioned packages for that architecture.No problem, no hurry here. I just wanted to mention that.
-
@Talisker said in I made a WireGuard package for pfSense:
However. I the gateway is considered down, which means I cannot route any traffic through the tunnel. I have two redundant OpenVPN to Mullvad, and want to be able to select which traffic should be sent by wireguard. But since the gateway is considered down, I cannot get it to work.
Leaving the monitored ip the same as the gw ip, also for me gateway appears to be offline.
But changing the monitor IP to an external IP, the gateway is up and running.Mine is pinging cloudflare ip:


Hope you can fix it.
-
I just tried this out for myself on an up-to-date 2.4.5 bare-metal install. I found I had to use the following components to get it to work, the original links are out-of-date:
1. pkg add pkg add http://pkg.freebsd.org/FreeBSD:11:amd64/latest/All/bash-5.0.17.txz
2. (opt.) pkg add  pkg add http://pkg.freebsd.org/FreeBSD:11:amd64/latest/All/bash-completion-2.10,2.txz
3. pkg add http://pkg.freebsd.org/FreeBSD:11:amd64/latest/All/wireguard-go-0.0.20200320.txz
4. pkg add http://pkg.freebsd.org/FreeBSD:11:amd64/latest/All/wireguard-1.0.20200513.txz
5. pkg add https://github.com/Ascrod/pfSense-pkg-wireguard/releases/download/v1.0.0/pfSense-pkg-wireguard-1.0.0.txz
But now, I'm lost in how to configure it. The "?" link doesn't go to any sort of instructions. I trust the OP, I just don't know what to do after I get things set up.
-
@dubatech No, I just wont get it to work.
I have used ping.sunet.se = 192.36.125.18 and other IP addresses specificly intended to answer to ping, but cannot get the gateway to be considered up.
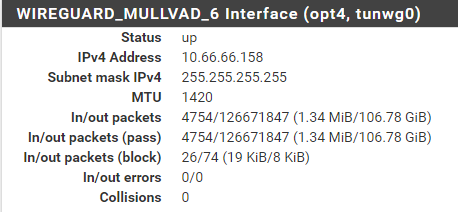
Apparently there are traffic through the interface, but I do not get a "gateway" IP for it:

In OpenVPN the IP is has been given dynamically is the gateway, but the hardcoded IP in the Wireguard doesn't show up. I have tried to set is as fixed in the Interfaces-declaration, but it still only says dynamic on the status page.Finally. I got it to work. I dont really know why. I think it was because I changed the Public key by generating a new one and upload it like this:
curl https://api.mullvad.net/wg/ -d account=YOURMULLVADACCOUNTNUMBER -d pubkey=YOURPUBLICKEY
I assume that the key alreay are URL-encoded.
I then changed the IP address in the wireguard configuration to the IP I got as a reply on the curl command above!!! -
I got this to work. It wasn’t easy, but I’m excited about the speed WireGuard promises.
I first had to setup a standard WireGuard vpn on a Linux system so I could understand WireGuard.
I understand OpenVPN really well. I make VPN tunnels professionally. And still I could not figure out WireGuard without first understanding how it compares to OpenVPN.
So there are two different kinds of connections. One is the hub and spoke, like a $5 a month digital ocean Linux computer as the hub and your office work as a peer and your home as another peer. With this setup you only need to put firewall rules on the cloud server.
Then there is the site to site. Like going directly to your office from your house. Assuming you have control over the firewall on at least one of these points.
Let’s say you want to vpn into your work computer from your house. Without a cloud computer intermediary so you will now setup site to site. So on your home firewall you will need to open up the UDP port number that WireGuard assigns ti the server interface. I think it’s randomly assigned you just need to open it up on the WAN interface under firewall rules.
Now to complicate things, or make them simple, we will have to install this at your house, on a pfsense firewall. But obviously WireGuard can be installed on almost any OS.
So this package is confusing at first because I didn’t understand WireGuard. So again you must first understand how WireGuard works, before you can use this package.
My biggest note for the developers is to put (optional) next to pretty much every text box expect the IP address field, the allowed address field, and the keys.
But I’m not trying to bash on the developers, I got this to work with their package and you can too.
The WireGuard packages for FreeBSD have been updated since the developer made his how-to. I hade to manually hunt for the “latest” WireGuard packages and then update the commands.
To be honest it’s been about a week since I did this, and I also installed WireGuard on an Ubuntu server and a raspberry Pi. So I’m not 100% sure you will encounter this error. But when I updated the repository to Debian I got an invalid key message. And I had to hunt for a better repository. Which took a while. I’m pretty sure that was just on the raspberry Pi WireGuard part.
So back to PFsense wire guard. I installed the WireGuard iOS, by manually finding the FreeBSD latest WireGuard links and then installing them via SSH access to the PFsense.
If you don’t know, you can enable SSH access to your pfsense server in the general or advanced tabs. I cant remember exactly. But to be brutally honest, if you can’t figure out how to SSH into your PFsense firewall, then installing this Beta version of WireGuard is probably going to prove too difficult.
So I’ve finally got these WireGuard apps installed. And then I install the package from the developer.
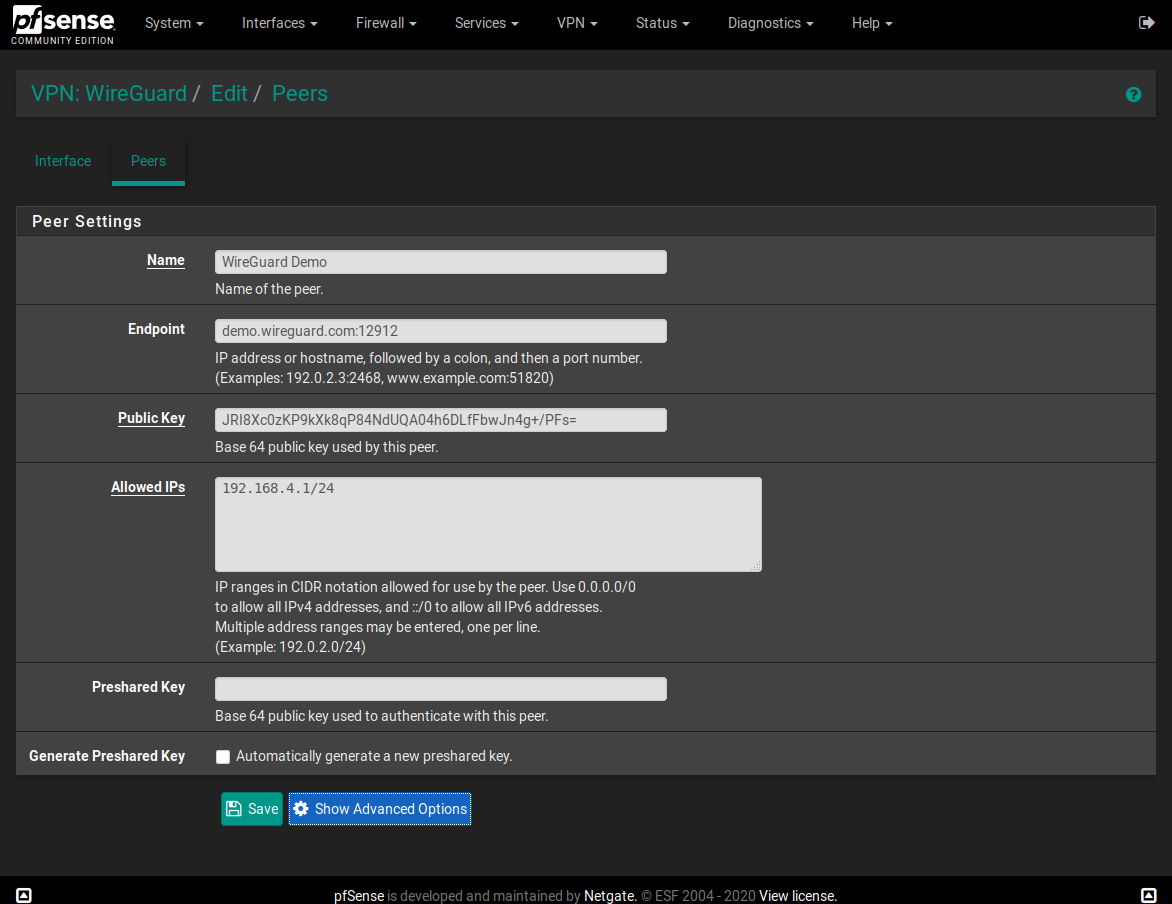
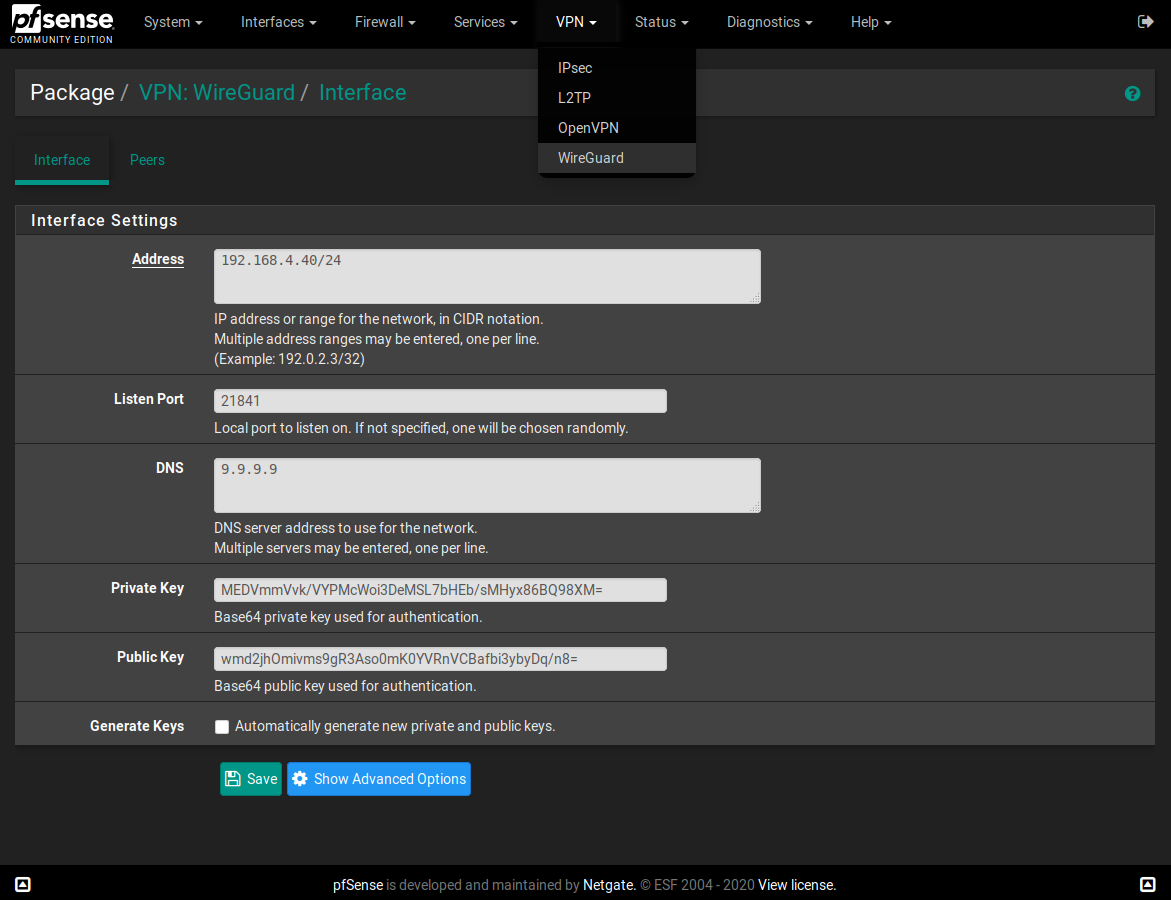
It all works fine. Now I go look at the WireGuard tab and input a bunch of numbers, none of which I understand. And of course it doesn’t work. Because I have no idea what addresses belong to what. And then those stupid keys, I don’t understand them either. But they are not stupid, I’m just ignorant.
So again I have to research WireGuard. It turns out that each WireGuard install, on both the client and server will have to create an interface with an IP address.
So I put in 10.45.50.1/24 as my interface IP on the server. Then on the client I typed in 10.45.50.2/24. So that the client and server can be on the same subnet.
Now there is a catch. When I type in the allowed IP I have to type in 10.45.50.2/32 on the server. So that server will allow the client to connect. Notice the /32. That’s the issue. The WireGuard service won’t start on the server without the /32 on the allowed IPs.
But the interface IP can have a /24. But the allowed IPs on the server have to have a /32.
Now to make things confusing. If you are on the client side, like you want to share your office LAN out to your home computer, over the VPN, then you can type in 192.168.50.0/24 in the allowed IPs but only on the client side. This will also create a route in the routing table on the client.
But I’m sure on the server for the tunnel network, you have to have that /32 at then end of the allowed IP. Okay moving on.
Now their are those ridiculously complicated keys. Forget about trying to figure this out without research. But basically the server will have a public key and a private key. And the client will Also have a public key and a private key.
So first, the server interface, remember the IP address of 10.45.50.1/24??? Well it needs a private key. WireGuard will generate this key for you. And they are generated in pairs. So that the private key, authenticates the public key.
So now you got the server interface with an IP and a private key, copy the public key over to your client system. Then point the client to the server via the servers Public WAN address and use the port number that WireGuard gave itself on the server.
Make sure to open up the firewall at your house to port forward the WireGuard port coming from the internet into your pfsense box. Oh right, you are using a pfsense box, so then at your house just add the WAN rule to allow the UDP port number in. Assuming your pfsense box is the Firewall for your home. If not then You need to port forward.
Anyways, where are we? So we are on the client system now. We have the public key from the server. Okay so this is confusing. Now the client computer the is also going to create its own unique private and public keys. We need to use the private key of the client system, on the client system to create the interface on the client system. Sorry I can’t write that any clearer.
We need to give the interface id of the client 10.45.50.2/24. And then the private key file will just sort of stick itself to the interface
automatically.But now you need to put in the endpoint IP or direction to the server. So that’s the server public WAN IP and port number that pfsense server gave you earlier. And remember when I told you to copy your public key from the server, well now you can paste it into your client system under the peer section under the endpoint area. You are going to need to search for simple WireGuard setups to understand exactly how to do this.
Basically the server has a peer section and the client has a peer section. They also both have an interface section. The interface section is the IP address of the interface that WG is going to create when you bring the service up. And the peer section is going to connect the two endpoints together.
So now we have half of our setup. We have both interface IPs assigned one on the server (10.45.50.1/24) and one on the client(10.45.50.2/24). We have the public key of the server on the client peer config line and we have the public key of the client on the peer config line of the server. So the two peers can authenticate based public private key exchanges.
I hope that makes sense. I’m really getting tired of writing this.
Anyways, so now you need to establish the peer section on the pfsense box (server). So copy the public key from the client over to the pfsense box, under the peer section.
Okay now, here is where WireGuard is very different than OpenVPN. So WireGuard clients have an endpoint address. But the server has no way of connecting to the client. So the initial connection has to come from the client to the server before the tunnel will work. So you don’t need to put endpoint WAN IP addresses on the server side.
So like I said before I’m not sure if you need to put the LAN network that is behind the office computer on the server allowed IPs or not, but thinking about it, I have no idea. I’m already confused.
But let’s stay on topic. Let’s just get the two remote systems talking. So on the server we have our interface IP and our allowed IPs. Then we have our public and private keys. Now, we are still on the server, moving to the peer section on the server.
The peer section on the server has the public key of the client and maybe this would be the place to put the allowed IPs. I can’t remember exactly. But basically the server has to allow the peer interface in. So on the server we have to allow 10.45.50.2/32. Notice the /32. Now I tried to add a /24 and it didn’t work.
Now on the client side. We have our interface IP 10.45.50.2/24 along with the private key of the client. Notice that the interface IP can have a /24 but the allowed IPs on the server side can only have a /32.
We are still on the client, under the peer section we have the public IP of the server under endpoint and the port number of the server. There are two port numbers. The client also creates a port number for the server to reply to. But we don’t have to manually add this client port number to the server, not the endpoint on the server side because when the client connects to its peer(the server) the client sends its public wan IP and random port number. The server automatically inputs this data in the wh0.conf file, on the server, and then the server can reply back to the client.
Remember that in order for the tunnel to come up. Both interfaces have to be up on the server and the client, and then the client has to make first contact to the server.
Additionally I recommend writing a keep alive Command on the client side so that ever 25 seconds it will send a packet to the server keeping the connection alive.
So now we have a site to site WireGuard tunnel. At this point you can play around with the allowed IP 0.0.0.0/0 which basically means send everything over the tunnel. I think that would be on the client side. I think you can have /24 network addresses in the allowed IP line, but only on the client side.
Yeah it’s a lot. And this package works fine. I think it’s just WireGuard that is the hard part here. So communicating how to setup WireGuard is going to be the hard part in getting these guys on this new VPN tunnel tech.
-
@TidalWave123 Remember that it is not based on ethernet. You don't need the IPs to be on the same subnet, since they are not going to ARP. I think that they in theory could be on totally different networks like PPPoE.
The private and public key is not at all confusing. It is basically standard PKI. Encrypt packets with the other sides public key and only that sides private key could decrypt (see RSA/assymetric encryption).
Regarding what you permit to the other side, it is only in the tunnel definition. You could hopetully both with rules and routing limit to exactly IPs/ports you would like to permit.
(And I am a noob at pfsense. Have worked with commersial firewalls for 20+ years).
-
@Ascrod I'm using Mullvad with the AllowedIP set to 0.0.0.0/0 and everything works without problem.
But I can't find a way to route only specific ips and not all the traffic.
I've tried to set the AllowedIP like givenIPfromMullvad/24 but it doesn't work..Thank you very much,
-
@dubatech 192.168.200.5/32 works for single ip.
-
@dubatech I think this is what bothers me as well. I want to use the interface as gateway in routing, but it won't work. I think I have tried everything without success.
I want to be able to route specific traffic over the tunnel and also have redundancy with a OpenVPN-tunnel by using gateway groups. I doesn't seem to work, regardless if I set the IP as static IP, use that IP in the NAT-section or whatever.
-
@Talisker you can use the ip/32 received from mullvad as the gateway ip and route traffic to it.
Please, note that if you leave that ip as monitored ip, gateway will not go up.
If you use mullvad dns (10.64.0.1) as monitor ip will go up.With the wireguard setup you can use it in a gateway group, with other openvpn client gateways.
I was asking about "Allowed IP" because I wanted to setup wireguard peers (mullvad servers) without using the 0.0.0.0/0.
For example:
I've setup an OpenVPN client gateway and I'm routing some traffic to it.
On the routing tables, for it, I've:
10.28.44.0/22 (destination) - 10.28.44.1 (OpenVPN Client gateway) - ovpnc1 (netif)With wireguard I wanted to setup something like this, without using 0.0.0.0/0 but I don't know if it's possible...
-
@dubatech I have used diffrent IP adresses, but never the /32 address I got from Mullvad. (Because that would be like pinging 127.0.0.1). I have used 1.0.0.1 and the gateway is "online". If I use it in a gateway group, it just wont work. I have two OpenVPN-tunnels with the exact same setup, which are working.

The Rule doesn't seem to trigger, even though It is identical with the OpenVPN ones:

(I am using smokeping through a Clavister firewall to create ping from different source IPs to the same destination. The three rules lookes identical, but the one with Wireguard doesn't trigger).When it comes to 0.0.0.0/0. I have no problem with that, I use rules and routing in order to only send the traffic I want through the tunnel. I don't really see the need to limit the actuall WG-tunnel for that.
-
@Talisker said in I made a WireGuard package for pfSense:
@dubatech I have used diffrent IP adresses, but never the /32 address I got from Mullvad. (Because that would be like pinging 127.0.0.1). I have used 1.0.0.1 and the gateway is "online".
I use the /32 address for Mullvad as the gateway ip and Mullvad dns server (10.64.0.1) as monitor ip and it's working in a team with other openvpn clients.

-
@dubatech But... Gateway IP is fixed as "dynamic" in the configuration?
I have tried using that IP in the NAT section, and I have set it as "static" IP on the actuall interface declaration. I just won't get it to work:(I tried a new public key upload now and are setting it up again...
-
@Talisker Create a new WG gateway and place that /32 ip on the gateway ip.
My config:
-
@dubatech I cant change "dynamic" as gateway. Do I have an old package, or do I have to go into the configuration file and do the change in text mode?

-
Ok, you have "Mullvad_Wireguard_6" gateway but create a new one with the same interface and then give a new name and place the ip.
I've pfSense 2.4.5 and I can do it without problem. -
@dubatech After manually setting the IP in the XML-file it started working. :)
Now It is no longer grayed out, so I can change it from the GUI as well.
Thanx!
