Port forwarding not working on fresh install of 2.8.0
-
Hello all,
The following must have been asked about and discussed a bazillion times by now, and it’s by no means new territory for me, but please help a brother out here.
Recently I’ve upgraded my pfSense machine from 2.7.2 to 2.8.0 and this initially went well.
After having a go at installing an alternative driver for my RealTek NICs (see https://forum.netgate.com/topic/197649/package-RealTek-re-kmod198-for-pfsense-2-8-0-amd64) things went a bit pear-shaped though.
After multiple attempts at getting this to work and many, many hours later I decided I had enough.
Dug up some other, slightly less ancient computer parts from my PC-graveyard, screwed together a new system and did a fresh install of 2.7.2, then upgraded to 2.8.0.The previous system had an onboard Marvell Yukon 88E8056 Gigabit Ethernet NIC and a PCIe TP-Link with a RealTek RealTek 8168/8111 chip.
The new system has one onboard RealTek NIC and now two PCIe NICs, all three are RealTek 8168/8111 based. (I know…..)Now obviously one of the NICs has a different name so simply restoring a previous backup wasn’t going to work.
On the former system the Marvel NIC named msk0 was assigned to the LAN interface and the RealTek named re0 did WAN things. As long as it wasn’t being battered by what the poor thing considered too much traffic anyway, hence my attempt at trying a different driver as mentioned earlier.In an attempt to save myself the hassle of completely redoing the entire configuration I thought of a simple solution – renaming the interface. That way, at least I thought, I could use a previous configuration backup and be done in a couple of minutes.
I created a file named rename_nics.sh in /usr/local/etc/rc.d/ on the pfSense box, made it executable and added a link to this file in /etc/rc.conf.
This way the interface “re1” would be renamed to “msk0” automatically upon starting pfSense just as it was on the previous system. The entries msk0.10, msk0.20 and msk0.30 were VLANs bound to the same NIC so I included these as well.#!/bin/sh
Rename network interfaces
ifconfig re1 name msk0
ifconfig re1.10 name msk0.10
ifconfig re1.20 name msk0.20
ifconfig re1.30 name msk0.30This didn’t quite work as I expected. After starting up pfSense there was a message saying something about an interface mismatch and it asked me to reassign the interfaces.
While the interfaces listed here were named re0, re1 and re2 it did give me the option to assign msk0 as LAN, and so I did.
After this I set up the IP addresses for the WAN and LAN interfaces (192.168.1.35 for WAN and 192.168.2.1 for LAN, same as on the previous system).Strangely though, the pfSense machine was unreachable from any other device on the network unless I manually disabled packet filtering (pfctl -d in the console). This way I was able to access the GUI, but after every setting I changed it would become unreachable until packet filtering was disabled again. For some reason the pfctl -d command doesn’t stick, but that’s not much of a problem.
Anyway, I proceeded to restore my configuration backup and rebooted, just to be greeted again by the same interface mismatch ordeal. So I did the same thing as before, and again the machine was unreachable unless packet filtering was disabled. Not a very workable solution so far…
Eventually I did manage to get everything up and running (after disabling packet filtering with the GUI option which did stick).
After the inevitable reboot though, I was back to square one. Please assign interfaces…. sighSo instead of trying to make this work I decided to once again do a fresh install, this time without restoring a backup but instead start from scratch, redoing most settings, NAT & firewall rules from memory and a few screenshots.
Took me a few hours to get most things working, but eventually all seemed well. Except for one thing.
I couldn’t get port forwarding on my WireGuard interface to work.
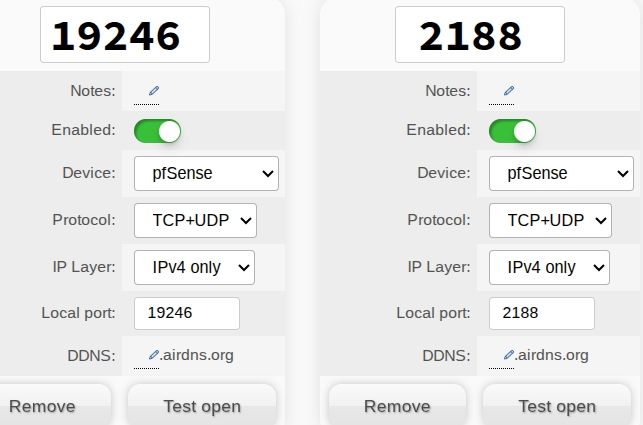
As far as I could tell I did the exact same thing as always. Initially I tried to forward the same two ports as before which were still listed in my AirVPN account.
When that didn’t work I requested two different ports and configured these in pfSense. Same result.Perhaps I’m missing something, so I’ve included a few screenshots showing how various things are set up. Hopefully someone catches something that has likely been overlooked or misconfigured by me.
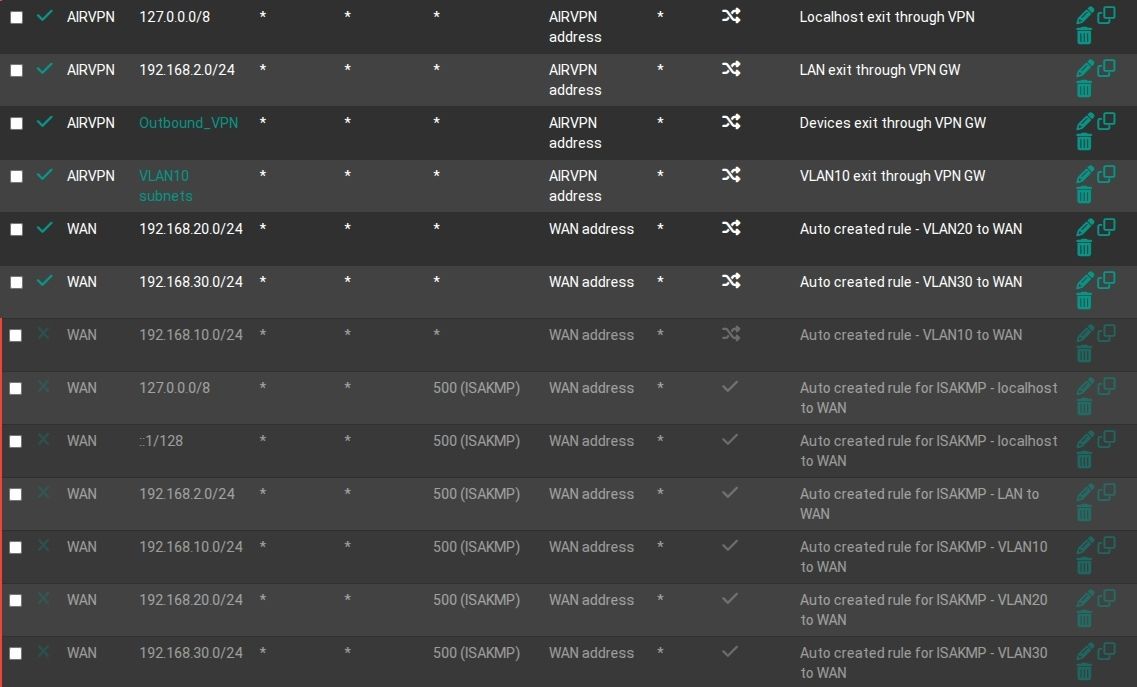
Looking at the firewall rules on the VPN interface I noticed that no gateway was specified there. Not sure if this was the case on my previous installation, but it seems logical to have the VPN gateway set for these rules, no?
So far it doesn’t seem to make any difference though, so I’m running out of things to try.Ports forwarded in AirVPN portal
qBittorrent config


VLAN 10 firewall rules routing traffic out through the VPN gateway

NAT port forwards and corresponding firewall rules on the VPN interface


Outbound NAT rules
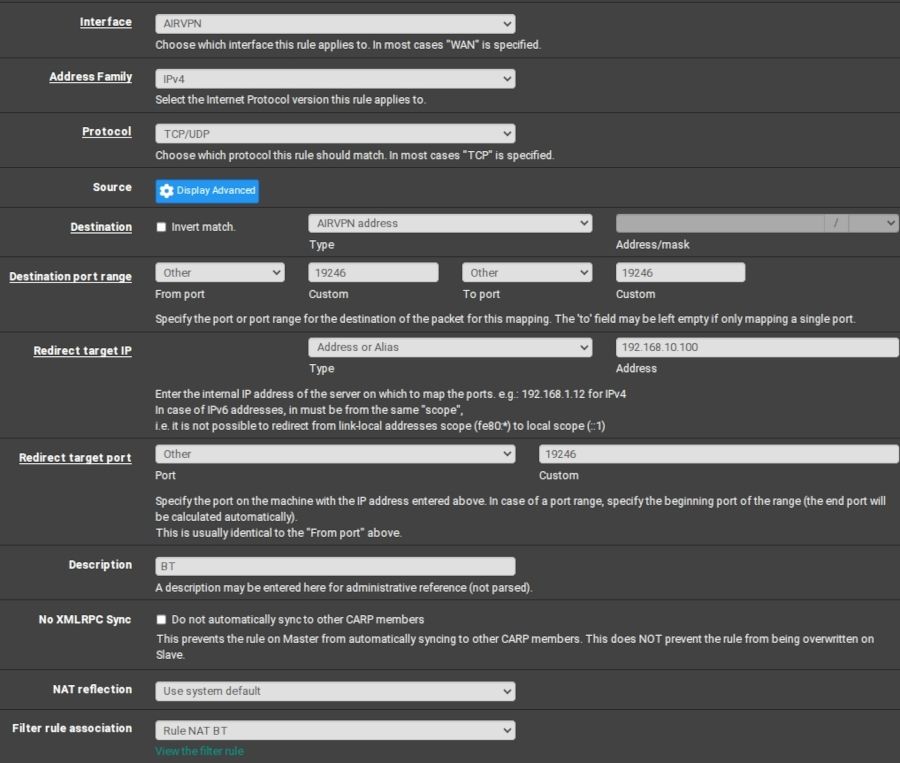
NAT port forward for BitTorrent
When looking at the states relating to this traffic, most look like this. Only when actively downloading do I see actual connections.


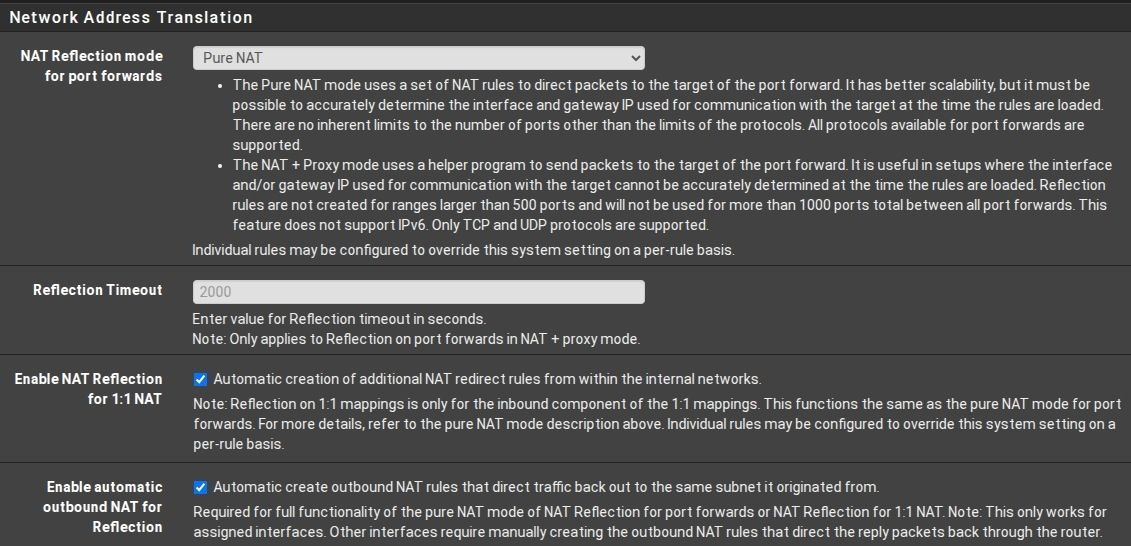
Not entirely sure what these NAT related settings should be set to, but I think they were like this before reinstalling pfSense.
A portion of the firewall log showing blocked traffic... wasn't sure why that traffic got blocked

After specifying the VPN gateway for the firewall rules on the VPN interface, there were no more entries of blocked traffic in the firewall but it still didn't solve the problem


Firewall rule as shown in the log when hovering over it

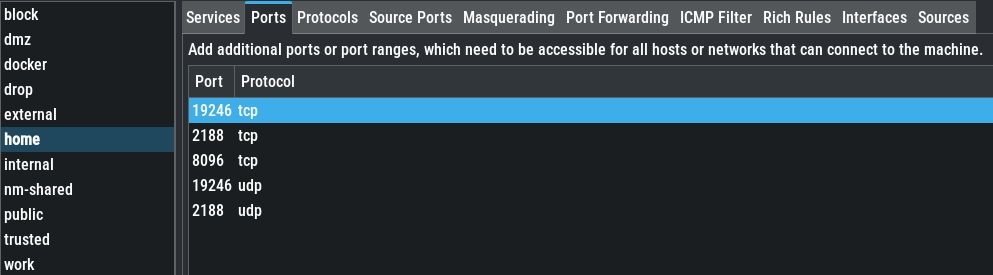
Firewalld and YAST Firewall showing the required ports as accessible


That's about all I could think of. If any other information is required I'll be happy to share it.
Thanks for reading!

-
The issue with port forwarding appears to be resolved.
Why and how, I have no clue, but simply requesting two different ports in the AirVPN portal and adjusting the NAT and firewall rules accordingly did the trick.
I'm fairly certain I tried this before without result. Oh well, a fix is a fix so consider that particular issue closed. :-)
As for the other "issue" which isn't really an issue anymore, I'm curious if anybody here has an idea what went wrong there.
Did my attempted solution of renaming a network interface on boot have any chance of working?
And why would the firewall keep locking me out while the anti-lockout option was active the entire time, and I attempted to connect to the firewall from the IP address assigned to my computer by said firewall, so nothing exotic going on there.
I had to repeatedly disable packet filtering from the console (thankfully the machine was still connected to the TV at this point) or permanently disable it via the GUI option just to be able to access the web interface or connect through SSH.
Just to clarify, it's not that important anymore. This is just a little curiosity and hopefully a chance to learn something. :-)
-
@SpunkThing By "lockout" do you mean not able to connect? Typically that is a rule issue, post the rules for your interface (LAN, or from wherever you were trying to connect).
pfSense will stop on boot if it detects interfaces have changed (added/removed/differ from config file).
-
Yes, by "lockout" I mean exactly that. Couldn't access the web interface, connect through SSH or even ping the machine until packet filtering was manually disabled.
At that time there weren't any firewall rules except for the anti-lockout rule which is present on the LAN interface by default if I remember correctly.
It was only after everything finally worked as intended that I started creating my own firewall rules, and from then onwards everything's been working fine. :-)
My best (and honestly a little uneducated...) guess would be that my self created interface mismatch prevented me from connecting to the pfSense machine.
I suppose the lesson here is that taking shortcuts such as the one described here can't be relied on. No more trying to rename interfaces on pfSense / FreeBSD.

On the bright side, no interfaces have gone down since performing a fresh installation and I sure gave it something to chew on.
That's with the default RealTek kernel driver, by the way, the same one that kept acting up in the past and which prompted me to try the alternative v1.98 driver.For lack of a logical explanation I suppose we can call that a lucky coincidence.