How to: Install pFsense on LXC VM / QEMU
-
Hello!
I wanted to share my findings here because this was a nightmare for me to figure out. I have gotten pFsense to work inside a LXC QEMU VM on Ubuntu server 20.
LXC is a OS level containerization platform, sharing kernel resources by default. LXC offers a VM mode where it leverages QEMU so you can run OSes with diffrent kernels. There is currently a known issue with QEMU and FreeBSD that prevent installing or using pFsense with the defaults.
These are the instructions I've come up with to get pFsense working. I assume you already have LXC and all its related packages installed, a working knowledge of pFsense, a external network (extbr0), an internal network (ian0) and the ISO downloaded.
- Initialize the VM.
Here we are creating a VM named pfsense, giving 4vcores, 4gb ram, turning off secure boot (I haven't been able to get pfsense to work with it yet), and defining the primary network.
sudo lxc init pfsense --empty --vm -c limits.cpu=4 -c limits.memory=4GB -c security.secureboot=false -n extbr0- Edit the VM.
sudo lxc config edit pfsenseYour config will look like this at first:
architecture: x86_64 config: limits.cpu: "4" limits.memory: 4GB security.secureboot: "false" volatile.apply_template: create volatile.extbr0.hwaddr: 00:16:3e:83:f3:01 devices: extbr0: nictype: bridged parent: extbr0 type: nic ephemeral: false profiles: - default stateful: false description: ""- Lets add add the secret sauce for first startup!
2a. Add the below QEMU settings to the config area.
raw.qemu: -boot menu=on -machine pc-q35-2.6 -device virtio-vga -vnc :2 -drive file=/home/wyatt/pfSense-CE-2.4.5-RELEASE-p1-amd64.iso,index=0,media=cdrom,if=ideWhat does this do?
-boot menu=on - allows you to pull up the boot menu and select the ISO.
-machine pc-q35-2.6 - The default machine is the newest Q35 witch FreeBSD has issues with. Here we specify 2.6 because this is the last version that works.
-device virtio-vga -vnc :2 - Opens a VNC server so we can install pfsense.
-drive file - We add the ISO.2b. Lets add our additional NICs. Add the below to the devices section. "ian0" is the network as named on the host.
  ian0:
    nictype: bridged
    parent: ian0
    type: nic
Your config should now look like this, save it.
architecture: x86_64
config:
  limits.cpu: "4"
  limits.memory: 4GB
  raw.qemu: -boot menu=on -machine pc-q35-2.6 -device virtio-vga -vnc :2 -drive file=/home/wyatt/pfSense-CE-2.4.5-RELEASE-p1-amd64.iso,index=0,media=cdrom,if=ide
  security.secureboot: "false"
  volatile.apply_template: create
  volatile.extbr0.hwaddr: 00:16:3e:83:f3:01
devices:
  extbr0:
    nictype: bridged
    parent: extbr0
    type: nic
  ian0:
    nictype: bridged
    parent: ian0
    type: nic
ephemeral: false
profiles:
- default
stateful: false
description: ""
Note: The order of NICs in this config is relevant to what you see in pfsense. The first NIC will show as vtnet0 or eth0, the second vtnet1 or eth0 and so on.
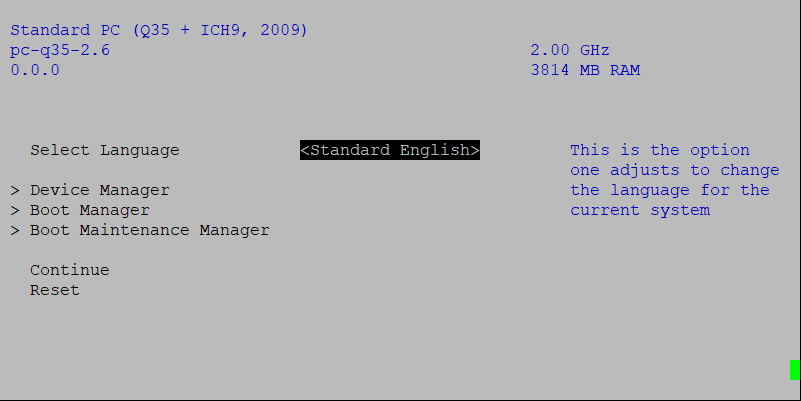
- Now lets install! Run the below command and spam the escape button until the bios boot manager comes up. The SSH or TTY session will be occupied until the vm is stopped, get another console open.
sudo lxc start pfsense && sudo lxc console pfsense
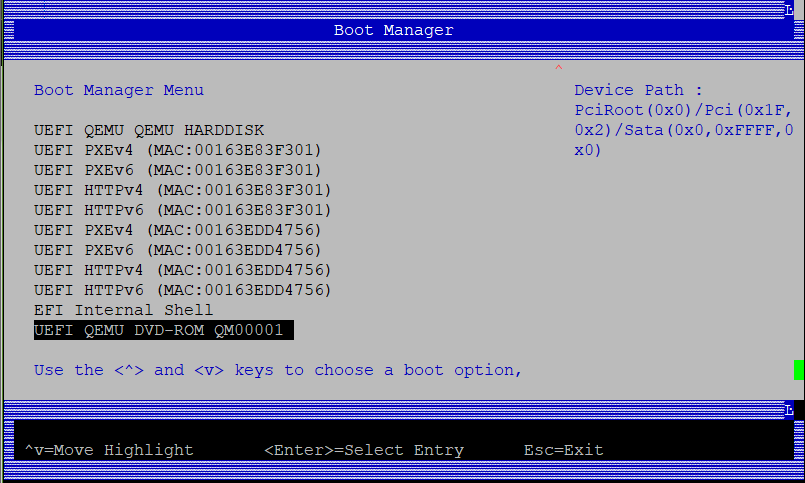
4. Go to boot manager then select the DVD-ROM item.

- Open VNC and connect to the server. "-device virtio-vga -vnc :2" would use port 5902. Install pFsense.
When you reach to completion screen and given the option to go into a shell or restart on pfsense, run the below command on the host:
"sudo lxc stop pfsense --force"- Now we need to edit the configuration again to remove the DVD-ROM. The easiest way to do this is to run:
sudo echo -n '-machine pc-q35-2.6 -device virtio-vga -vnc :2' | sudo lxc config set pfsense raw.qemu -- Lets start the container again then connect via VNC to finish the setup. Get the IP and make sure you have access to the web page. Once your done, use the halt system option.
sudo lxc start pfsense- Lets turn off that VNC. Do not leave the VNC active, there is no authentication by default and its meant for setup/diagnostics only.
sudo echo -n '-machine pc-q35-2.6' | sudo lxc config set pfsense raw.qemu -- At this point, you're good to go. Just just the VM back up and you're in business.
Eventually FreeBSD will become compatible with the current q35. When it does, just omit the "-machine pc-q35-2.6" from the config.
I hope this helps someone out! Any suggestions of improvements to this guide would be appreciated.
- Initialize the VM.
-
@wyattwic You did take the difficult path after all.
Lxc is for running linux. When qemu steps in, then it is plain good kvm. :)
If you do the same configuration tasks with libvirt which is native to qemu, you would end up to the same result (and without the bug... ) And a gui helps avoiding mistakes, making the process intuitive too.Its quite common to run pfsense under linux kvm anyways.
-
@netblues Running pfsense under KVM is very common and it would have been easier if I had gone that route. I am in a situation where installing and configuring KVM would be a one-off for just pfsense. LXD/LXC is directly connected to our management, backup and fail-over infrastructure and it makes the most sense to continue utilizing it exclusively.
QEMU and KVM are not the same. KVM is a full virtualization setup that runs directly on host resources, where QEMU is a hardware virtualization that runs in user space. Visualizing the hardware gives guest hardware consistency between cluster nodes and the possibility to run other architectures.
-
@wyattwic Yes, qemu is not kvm, however it tends to do all the dirty work, like bios emulation etc and then sends the code to kvm for execution, if there is such option, or emulates it.
It would be interesting to see performance differences between hardware virtualisation and emulation on such a heavy ι/ο related system such as pfsense. -
sorry to necro this but its the top google search for the topic - do you have any insight into performance difference between KVM vs LXC QEMU?
it would be nice to get a definitive answer on which is better